How to Deploy Google's AI Studio App Online for Free Using Netlify?
Step-by-step walkthrough on taking an application built in Google AI Studio and deploying it live on the internet for free using Netlify's instant drag-and-drop workflow.
Hey everyone, welcome back to TechRealTime! In today’s quick tip, I’m going to walk you through how to take a project from Google AI Studio and actually put it live on the internet. It sounds technical, but trust me, it’s super simple—and free—thanks to Netlify.
Let’s get straight into it.
Step 1: Download Your Project from Google AI Studio
First, head over to Google AI Studio and sign in to your account.
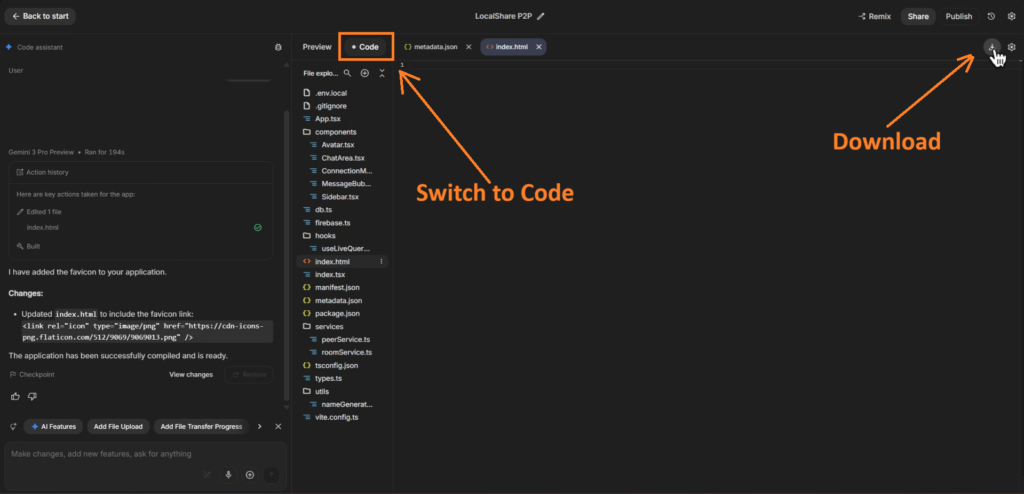
Once you’re in, go to the Build section and open whichever project you want to deploy online. Once your project is open, look for the Code tab (usually near the top or side) and click it. This switches the view to show you all the code files behind your project.
Now, in that code view, look at the top right corner. You’ll see a small download icon. Click it. That’s it—Google will package your entire project into a zip file and download it to your computer.
Step 2: Head Over to Netlify
Now, open a new tab in your browser and visit Netlify.
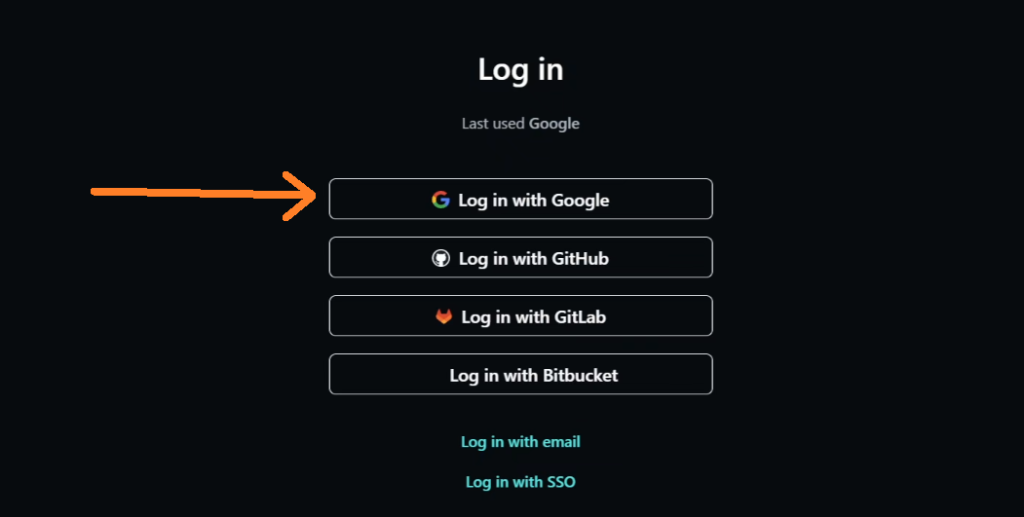
On the Netlify homepage, click the Login or Sign up button. I personally recommend logging in with your Google account—it’s the quickest way to get in without filling out tedious forms.
Step 3: Deploy with a Simple Drag and Drop
Once you’re logged in, you’ll land on your Netlify dashboard. This is where the magic happens.
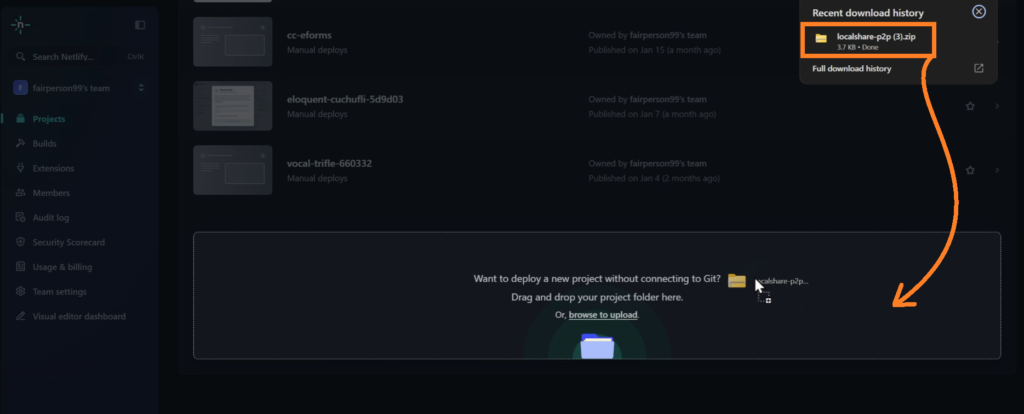
You’ll see a clear dropzone area in the middle of the screen that says: "Drag and drop your site folder here". You can literally drag the exact Google AI Studio zip file you just downloaded and drop it right there.
Netlify will immediately start processing it. It will upload the files, run the necessary builds, and handle all the behind-the-scenes configuration automatically.
After a minute or so, your app will be live worldwide!
Step 4: Get Your Link and Customize
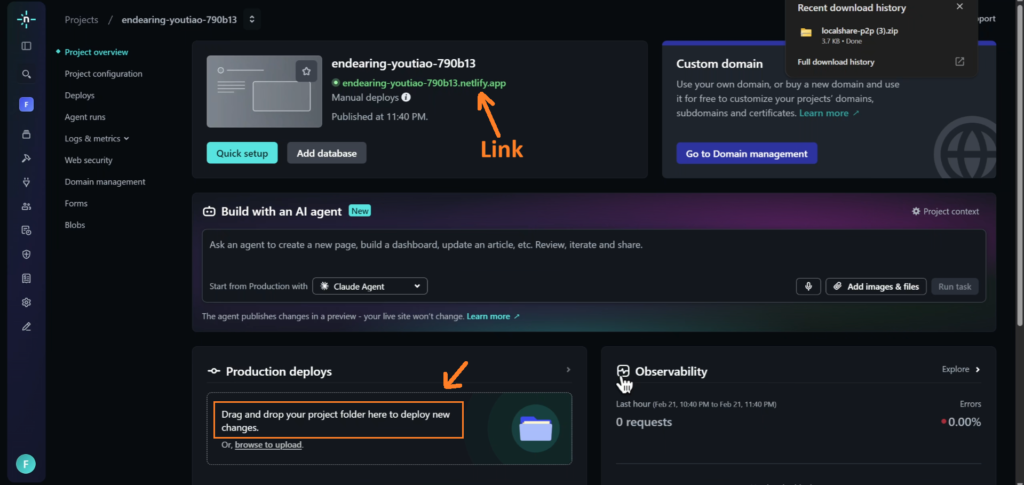
Once the build finishes, Netlify provides you with an instant live link. You can visit it right away and share it with anyone.
If you want a cleaner custom address, head over to Site settings or Domain management. From there, you can customize the subdomain or connect your own custom domain.
Bonus: How to Handle Project Updates
Made some changes to your project in Google AI Studio? No problem:
- Download the updated zip file again from Google AI Studio.
- Return to the same spot on your Netlify dashboard.
- Drag and drop the new zip file. Netlify will overwrite the previous build and redeploy online automatically.
Frequently Asked Technical Questions
Is deploying on Netlify really free?
Yes, it is completely free. Netlify offers a generous free tier that is perfect for deploying small projects and prototypes straight from Google AI Studio without any cost.
Do I need to know coding to deploy on Netlify?
Not really. It is mostly a simple drag-and-drop workflow, so you can easily do this yourself. Netlify handles server builds and CDN distribution automatically.
What if I encounter an error during deployment?
Check the deploy log on your Netlify dashboard. It will pinpoint the exact missing asset or file configuration in your project.
Can I use my own custom domain name?
Yes, you can definitely connect your own custom apex or subdomain on Netlify for free.